Konichiwa Minna-san. Welcome to my second Photoshop tutorial! Today lesson is about the Clone Stamp Tool and other helpful tools. These tools are actually very useful when it comes to Cleaners, Editors, and even me when I typeset scans. It can also be useful in other graphic design projects too!
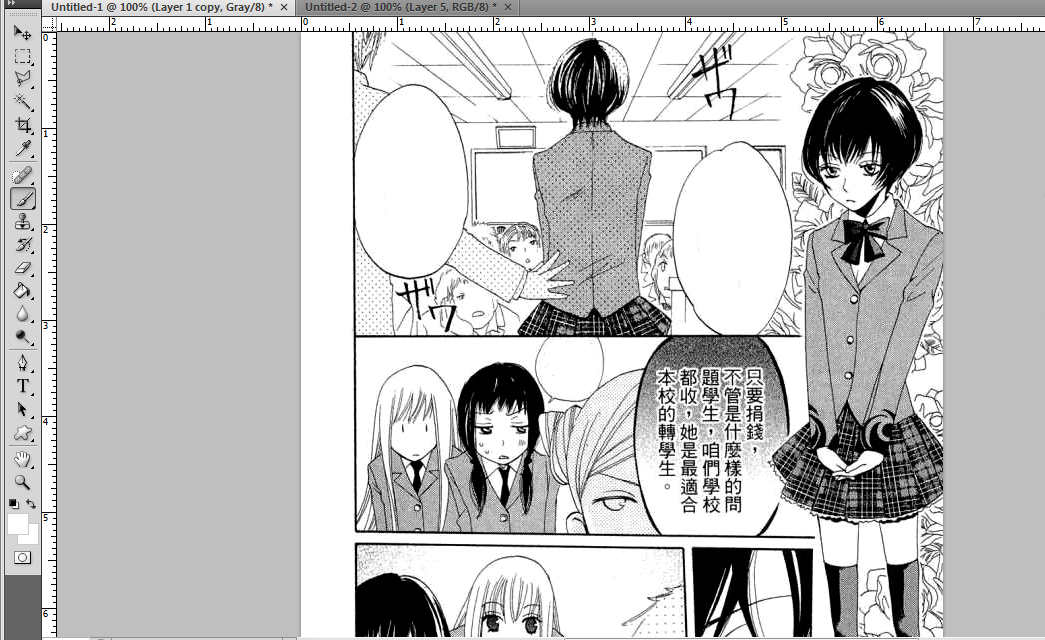
Since we are a manga scanlation group, I decided to use one of the old scans I had to clean. I’ll be using a page from Chapter 19 of Karakuri Odette. We’ll be using the Clone Stamp tool and various other tools here to clone and clean parts of text bubbles.
You know what, I’ll show you guys how I personally clean an entire scan. It’s a long process, believe me. If it was short, then all mangas would have been released by now. Shall we begin then?
Things you’ll need: -Any version of Adobe Photoshop
-Anything you want to clone but for this tutorial we’ll be using an unclean manga scan
-Patience
Step 1: Run Photoshop! :] The version I’ll be using for this tutorial will be Adobe Photoshop CS4. Any version of Photoshop should work fine.
Step 2: Open up the scan. Noticed how it’s unclean, grainy, and…not cool it is!? I’ll do a side by side comparison later. Go up to Menu>Image>Mode> Grayscale. It’s easy to work with a scan when it’s just black, white, and gray.
 Step 3:
I always make a duplicate of any of the scan I’m going to clean. That way, when I make a mistake, I don’t have to start all over. To Duplicate a Layer, press CTRL J or Menu>Image> Duplicate.
Step 4: Next, I level the scan. Leveling allows the user to balance out the blacks and whites of a scan. You can either darken a scan or lighten it. You can do the same with color too! To level an image, press CTRL L or Menu>Image>Adjustment>Level. A box will come up with something that looks like mountains . On the far right is the amount of whites, the middle is the grays, and the left is the black that the picture contains.
 Step 5:
Move the arrows under them to the desire quality that you want. Each scan is different so try not to use the same adjustments for all of your scans. I usually move the arrows to the peak of each mountain, the quality comes out better. Try not to make it too white or too dark.

See the difference in the quality?
 Step 6:
 Next, we’re going to clean the picture!

I don’t use the erase tool. Ever. I use my brush tool! :] Using a regular round brush and the color white (or the scan color), clean out all the text bubbles that are easy to clean.
 Step 7:
 All we have left is that big gray bubble. :[ There is no color or brush that can match that kind of effect. So now we shall use the Clone Stamp tool! Notice on that text bubble how there are part where there no text? Place the stamp tool over that spot. Then press ALT and left click on your mouse (your cursor will change). Now, move your cursor over the text and just drag your mouse down. See how it clone that part and covers it?
 Step 8:
Continue to do so. You’ll probably have to move around a lot in that text bubble to get it all done. Like I said, it’s a long process. Imagine having to do this for 30 manga scans. :[ The first product should look like this! Left is the original and the right is the product.

There you have it! Not easy. These are just the basic of cleaning. There are a lot more that we have to clean when it comes to manga scanlations. But I just wanted to start with something easy. The stamp tool becomes one’s best friend during the cleaning process. Make sure to practice using these tools!
Let’s review the Tools I talked about today:-Grayscale (To take out all the colors of a picture) = Menu>Image>Mode> Grayscale
-Duplication of a Layer (to make a copy of a layer) = CTRL J
-Level (To balance out the blacks, whites, and gray of a picture) = CTRL L
-Clone Stamp Tool (To clone a part or picture onto another) = In the Tools Box
Things to remember:1. Take it nice and slow. Patience is the key to everything. If you rush you might make a mistake or ¬ruin everything. Thus, you might start over. Pace yourself.
2. Practice makes perfect. It might seem easy but it might turn out hard for those who are unfamiliar with the program. Experiment and learn the ins and outs of Photoshop.
3. Have an eye for details. There are little things that can ruin a picture so keep an eye out for it whether it’s the quality or just a smudge.


